Creating a personal website is a great way to showcase your portfolio, blog, or resume online. This tutorial guides beginners through the process using accessible tools like WordPress. Follow these steps to get your site live without advanced coding skills.
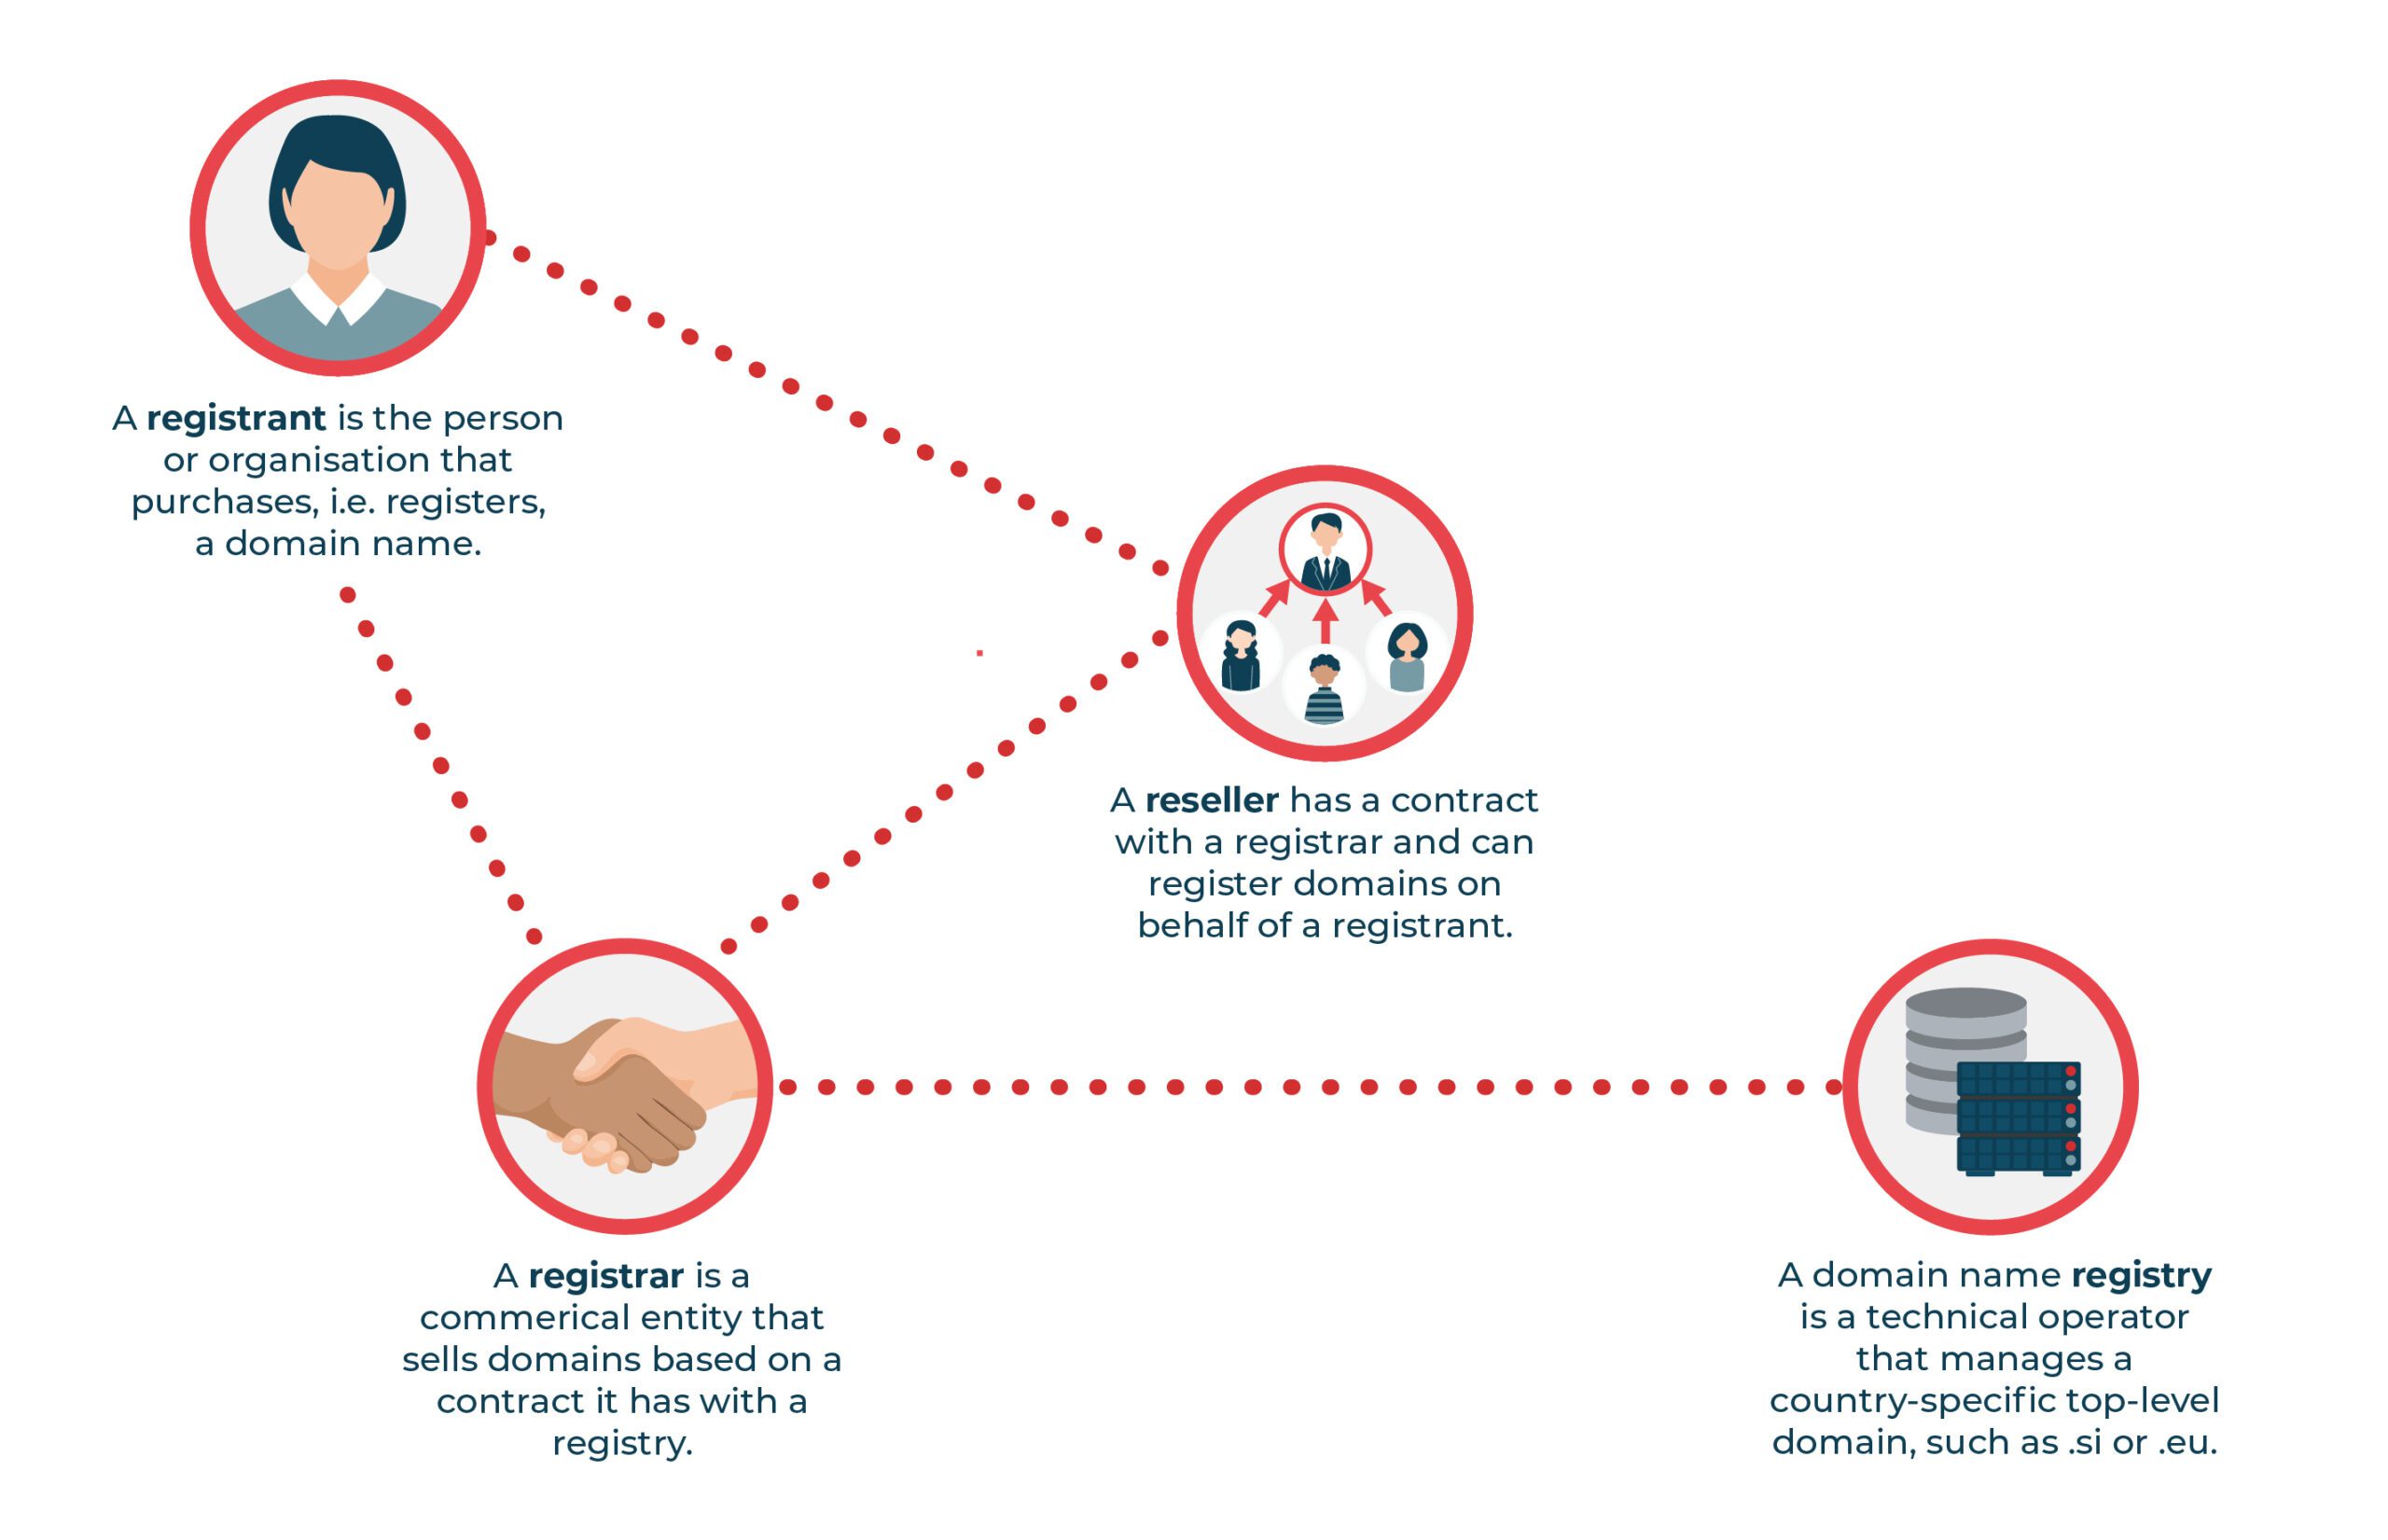
Step 1: Register a Domain Name
Choose a domain registrar like GoDaddy or Namecheap. Search for available names, add to cart, and complete purchase with your details. Expect to pay $10-20 annually.
Once registered, note your domain for later setup.
Step 2: Select and Set Up Hosting
Pick a hosting provider such as Bluehost or SiteGround. Sign up for a plan, often including a free domain for the first year. Install any included tools via the dashboard.
Point your domain to the host by updating DNS settings.
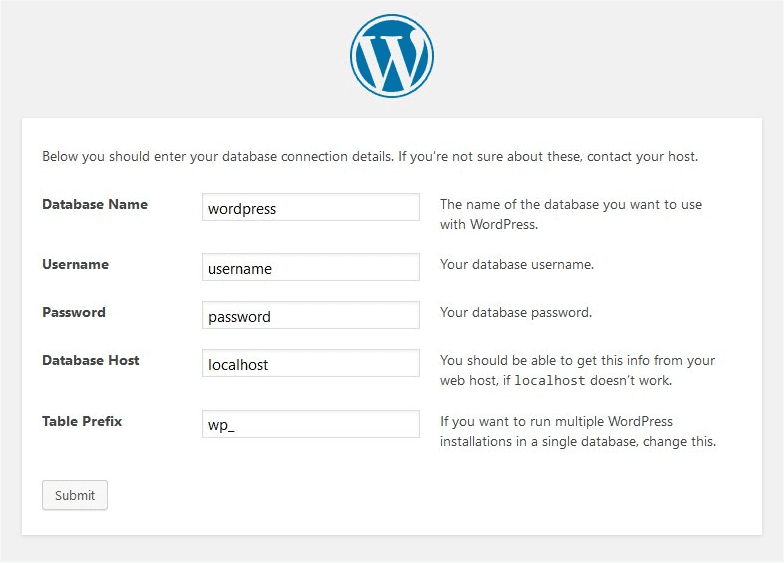
Step 3: Install a Content Management System
Use WordPress for ease. Most hosts offer one-click installation. Create a database if needed, then run the setup wizard to configure site title, username, and password.
Log in to the dashboard to start building.
Step 4: Design and Customize Your Site
Install a theme from the WordPress repository or premium options. Use the customizer for colors, fonts, and layouts. Add pages, posts, and plugins for functionality like contact forms.
Preview changes before saving.
Step 5: Publish and Maintain Your Website
Go live by ensuring DNS propagation (up to 48 hours). Add content, optimize for SEO with plugins like Yoast, and secure with SSL (often free via host).
Regularly update and backup your site.
For more tutorials, visit appstuf.com.